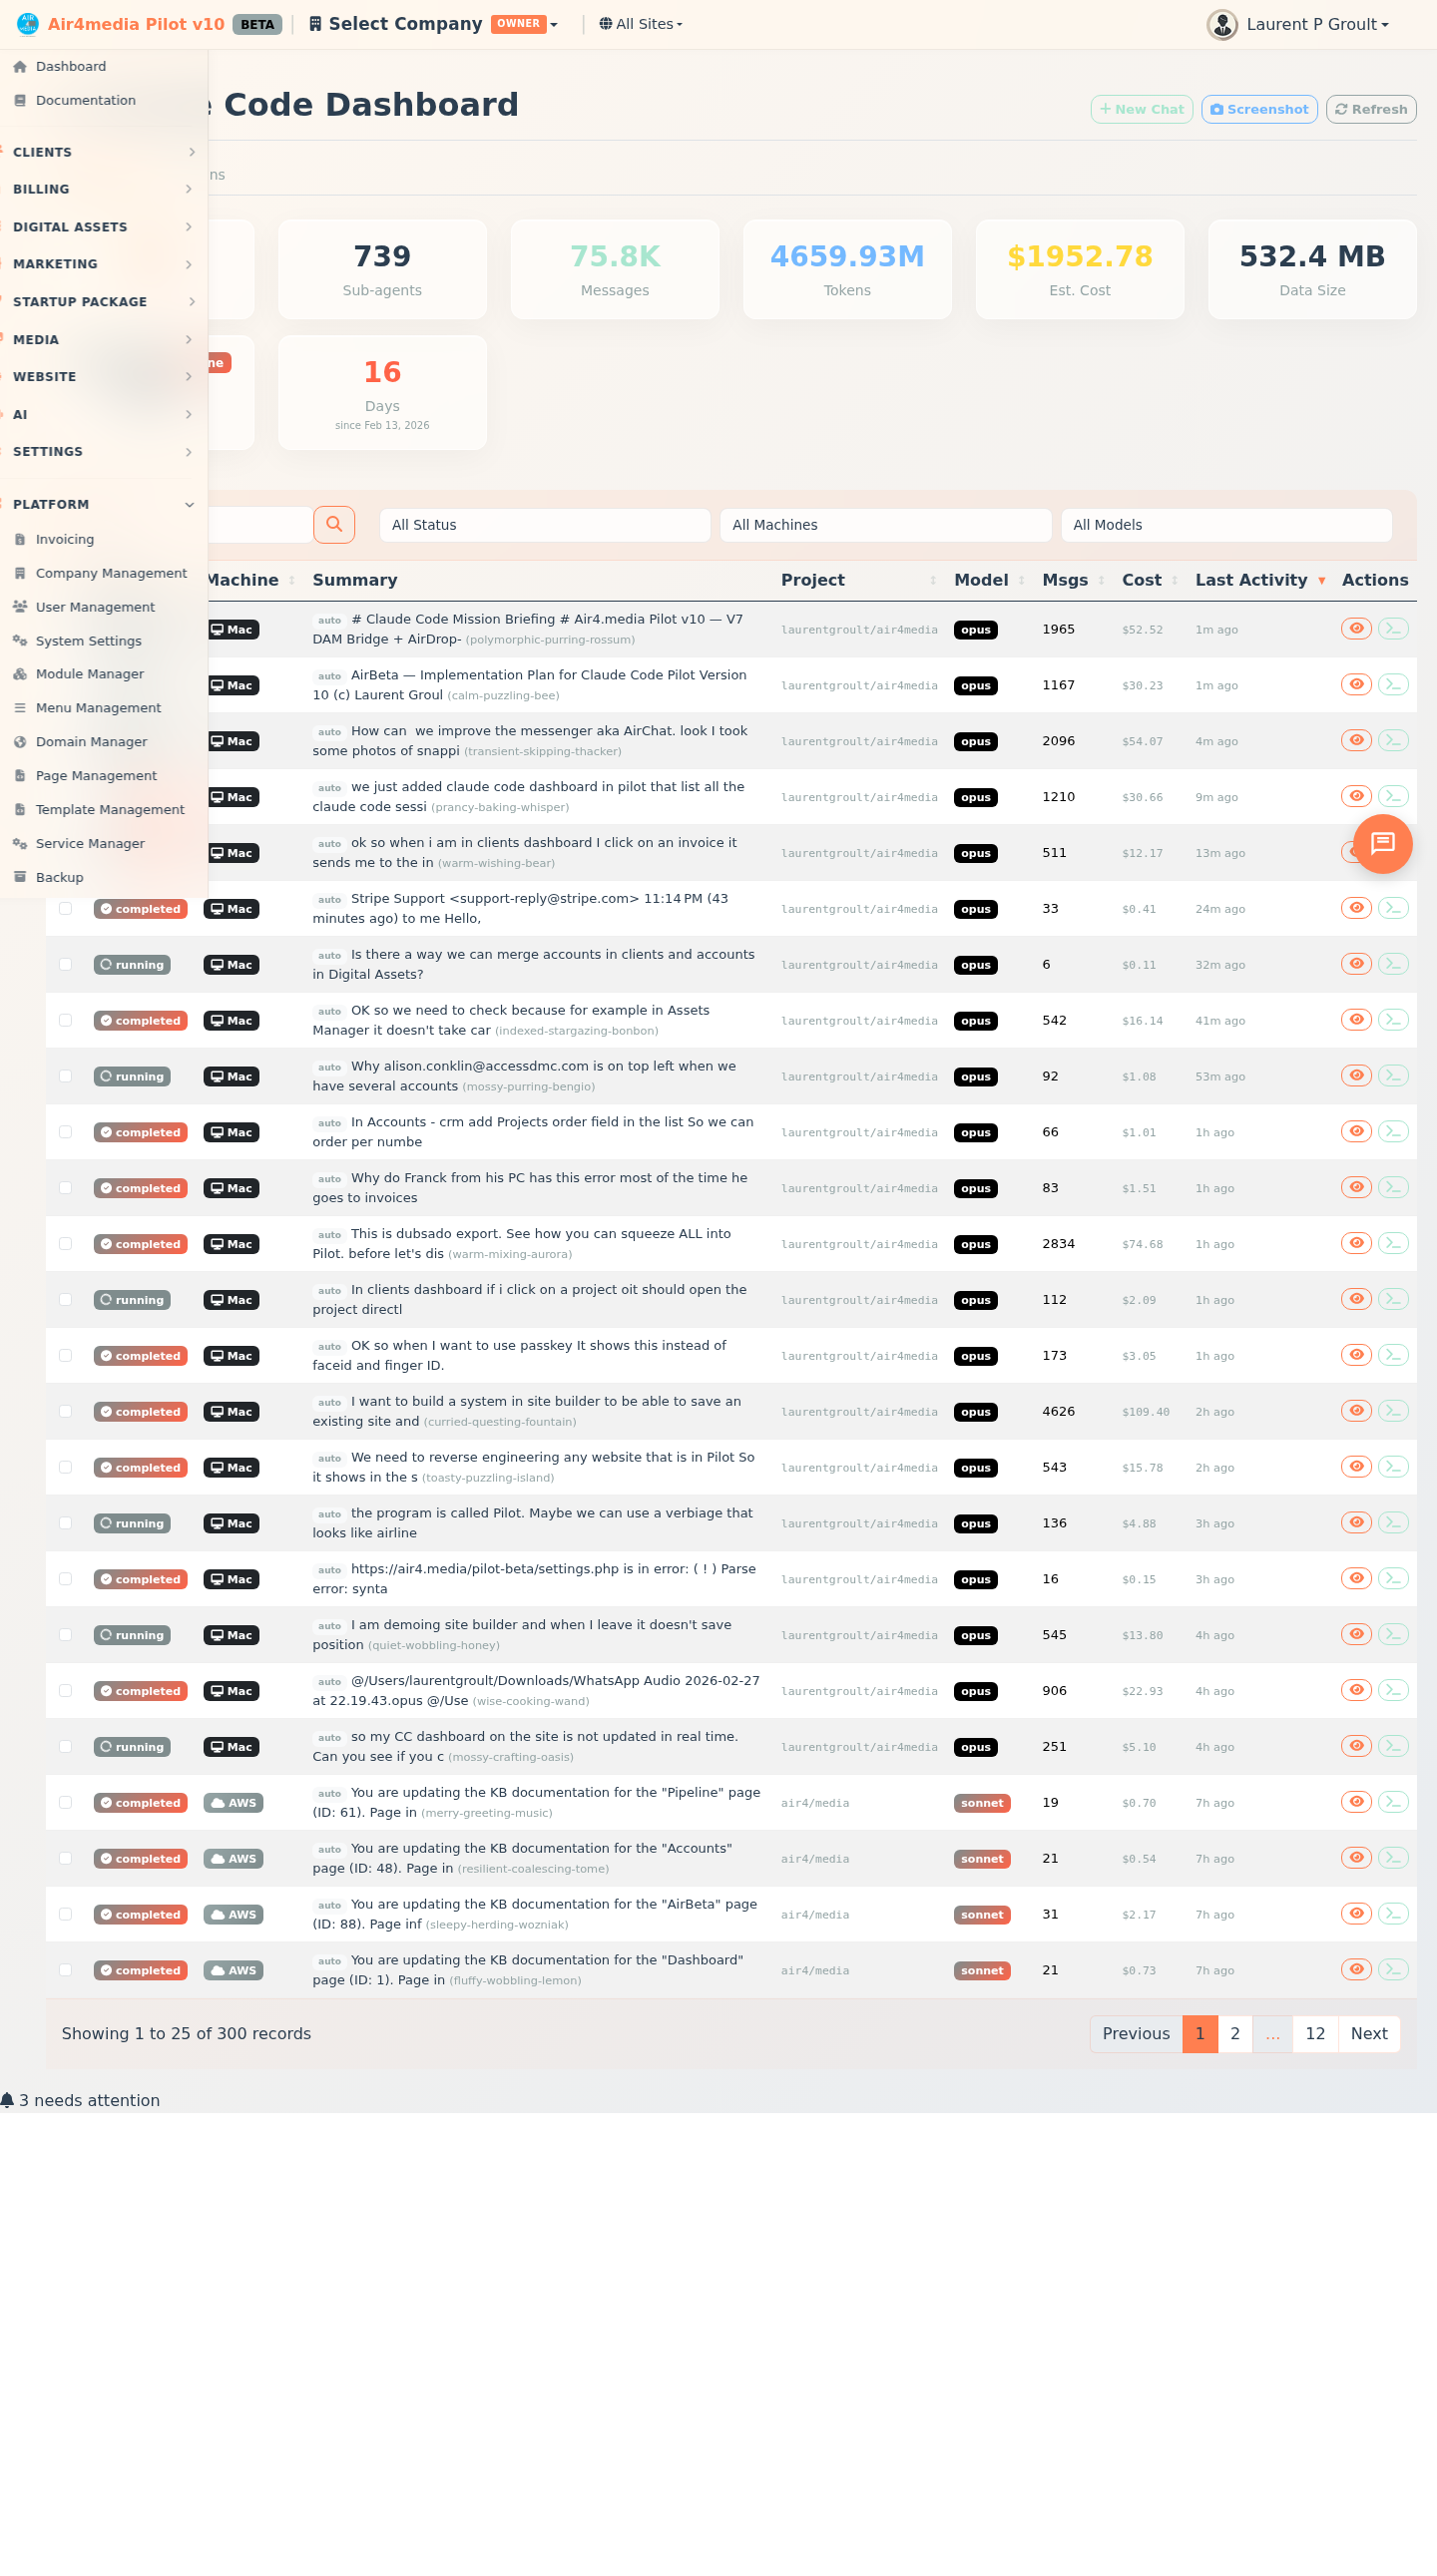
Claude Code Dashboard
Browse, search, and interact with all Claude Code sessions across your development machines from one central view. Track AI development plans alongside session history.
Key Features
- Sessions Tab: See every Claude Code session with status, machine, project, model, message count, and estimated cost at a glance
- Plans Tab: Review and manage AI development plans with priority, status, tags, and execution logs
- Live Stats: Summary cards show total sessions, sub-agent count, messages, tokens, estimated cost, data size, status breakdown, and days since your first session
- Filtering: Narrow the list by session status, machine (AWS Server or MacStudio), or AI model (Opus, Sonnet, Haiku)
- Search: Find sessions by keyword — searches across summaries, project names, slugs, and session IDs
- Session Detail: Click any session to read the full conversation history, including tool use, token counts, and per-message cost breakdown
- Live Chat: Open a chat panel to start a new Claude Code session or resume an existing one with real-time streaming responses
- Chat Attachments: Attach files (up to 500KB), platform source code, KB documents, or URLs as context before sending a message
- Page Screenshots: Capture a screenshot of any platform page directly from the dashboard
Session Statuses
- Running — session is currently active
- Completed — session ended cleanly
- Stuck — session went quiet without a clean exit
- Archived — session is older than 24 hours
Sessions marked auto were started by an automated process, not a person.
How to Use
Sessions
- Open the Claude Code Dashboard from the sidebar menu
- Stats cards load automatically — including total sub-agents spawned and days since your first session
- Use filter dropdowns to narrow by status, machine, or model; type in the search box to find specific sessions
- Click View on any row to open the full conversation history in a modal
- Click Chat on any row (or New Chat at the top) to open the live chat panel
- In the chat panel, select a model before sending; press Enter to send, Shift+Enter for a new line
- Use the paperclip button to attach a file, source code, a KB doc, or a URL as context
- Click Stop at any time to cancel a response still generating
- Click Screenshot in the toolbar to capture a screenshot of any active page
Plans
- Click the Plans tab — a badge shows how many plans are pending
- Stats cards display total, pending, in progress, and completed plan counts
- Filter plans by status or search by title, description, or tags
- Click View on any plan to see its full description, priority, tags, and execution log
- Click Run in the plan detail to send the plan to the chat panel for execution
- Change a plan's status (Pending, In Progress, Completed, Failed, or Cancelled) from the detail panel
- Delete a plan using the Delete button in the detail panel or the trash icon on the row
Tips
- The Est. Cost column shows approximate API cost per session based on token usage
- Sessions from both AWS Server and MacStudio appear in the same list — look for the machine badge on each row
- When viewing a session, long messages are collapsed by default — click Show full to expand them
- Thinking steps are hidden by default in session detail — click the thinking badge to reveal them
- Attachments are sent as context with your next message and cleared automatically after sending
- Use Refresh in the toolbar to reload both stats and the session list with the latest data